Updated:
14-Dez-04
The PhonoDude RIAA
Tube Amplifier
Hard Wired Version...
Introduction or "Why a hard wired Version ??"
That
is the question ... Actually the answer is simple; the PhonoDude turned out to
be a popular and successful design. The PCB version has made this
nice Phono amplifier available to a wider range of DIY's. Never the less, the
ultimate DIY idea is to experiment around with the circuit, changing some
components here and there and let evolution has its flow. For me personally I
wanted to built a somewhat compacter version in a chassis style similar to the
DDDAC1543. Also the Auridux is set up like this. The new Line amplifier will
complete this "line" of audio equipment by the way. Also this could be
another example for those who want to build there own hard wired version. I will
not go into the detail of the amplifier concept itself, as that is done already
with the previous (PCB) version.
For reference please download the full circuit here
A few words of interest may be... The power supply is a separate chassis as I wanted to minimize the influence of the transformers on the tubes and is switched on through a switch on the front of the amplifier chassis. Therefore it is possible to put the power supply chassis somewhere unattended behind the audio rack :-). This caused me one problem... I did not wanted to have 220 VAC line running through the power supply cables. I just wanted to have a no-current solution here. The solution is very simple as you can see on page 2 from the pdf-circuit. I use a very small transformer (so the idle current for stand by is also very low...) and a simple DC regulation with D1 and C1 to switch a relays which again switches the main transformer. The real TRICK now is, that in idle mode the relays is activated ! This means that to switch ON the amplifier, I break the contact and the relays will fall off. So now NO current is flowing when the amplifier is switched on.... No big deal may be, but why not?
Project
Description
Below I will take you through the various stages of the construction .....


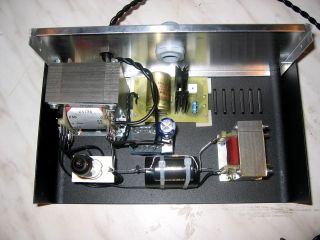
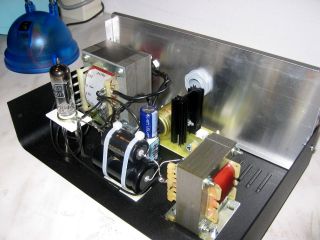
A few pictures from the Power supply Chassis. Cleary to see the small 6X4 regulator tube, the 2 Capacitors for the first DC regulation. These are no High End types as this will be done locally in the amplifier itself with BG WKZ types. This keeps the power supply as far as possible from the signal path... The filaments are fed by the well known LM317 DC circuit. You see, I use the very handy PCB's my self as well :-)
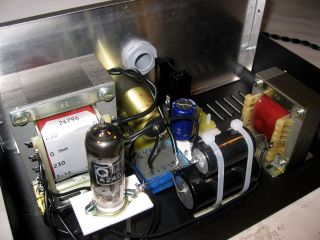
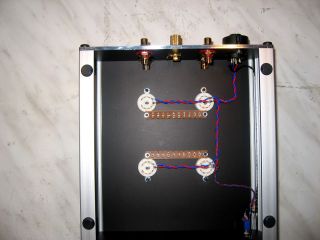
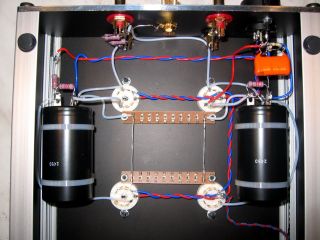
The Transformer and Choke are a special made Kit for the PhonoDude by Will Blaauw from AE Electric..... At the right the first set up for the amplifier chassis. I have used the same service from Schäfer, I used for the DDDAC1543. Perfectly drilled holes are a lust for the eye... Also the construction becomes relatively easy as it feels like a KIT; Just mounting the connectors and ready :-) A nice symmetrical setup and the use of the small soldering strips allows for an easy construction. I start with the twisted DC line for the filaments. I have used Teflon cable with silver/copper inside. Bought at AE...
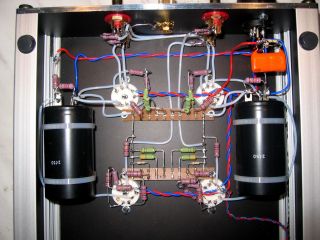
Then giving the BG WKZ capacitors a place as short as possible to the tubes, reducing the signal path. Building up the RIAA network is a piece of cake with the soldering strips. The signal wires are all 0.8 mm Pure Silver with Teflon tubes as isolation (yes, yes, again AE :-) In the network I used metal film for low noise and precision. For the rest I used the carbon Types, Triodedick is always talking about. Bought locally in Holland....
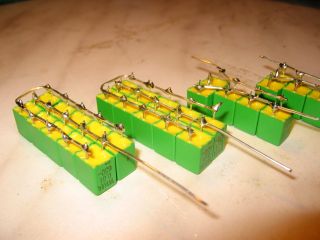
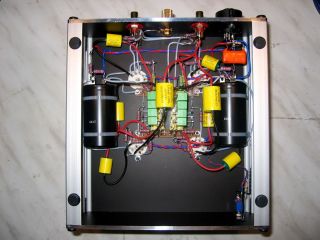
I decided to use Wima MKP4 high precision capacitors for the RIAA filter where the signal is lead to the signal ground. They are not directly in the signal path and the precision allows for a very accurate RIAA curve. By putting smaller capacitors in parallel, the value is becoming exactly what you need.... The resistors in the network are also selected on value.
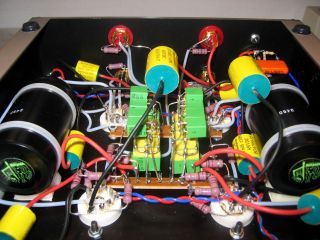
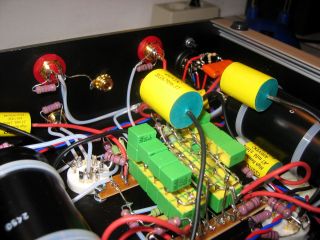
Close up how the RIAA filter components are mounted very closely to the tubes. The Auricaps are used as coupling capacitors as they are in the signal path and so far, I have had good experience with them. Very neutral, very smooth
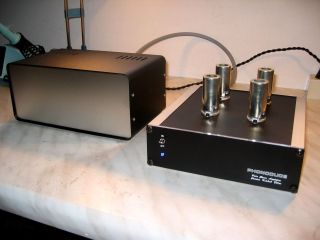
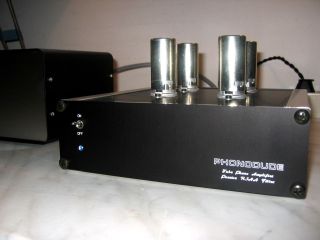
And this is how the whole thing looks like. The thick gray cable is a multi wire cable with 7 very flexible copper wires inside. The use of the metal covers for the tubes clearly made the amplifier dead quiet..... No humm or what so ever is audible...
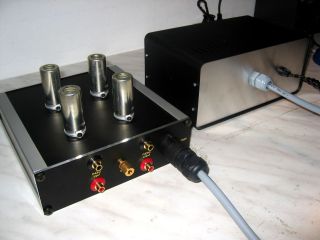
From the rear with the input output connectors and the Power supply cable solution....
Measurements
Of course the
PhonoDude was tested and measured to make sure the design ideas
also resulted in the required specifications.....
Below you will find all the
relevant data....
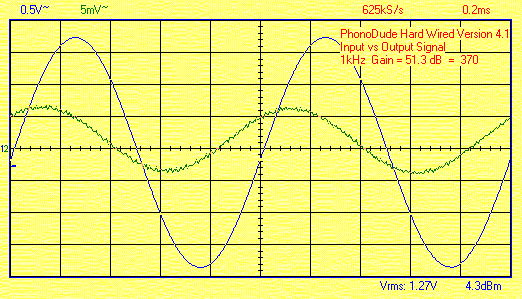
This shows
the standard (1kHz) gain of the PhonoDude --> 370 x
More then enough to drive any amplifier set. The little raffle on
the input signal is not real. This is just the scope at very low signal levels

Humm measurement with the metal covers on top of the tubes. Resulting in a -62dBV (so -62dB versus 1 Volt of signal). In practice the max output of the PhonoDude is roughly 3 Volt, so a meaningful Humm to signal ratio would then be ~72dB, which is a very good spec for a Phono amplifier !!! You see that the low frequency noise, which in a RIAA amplifier is dominant is the same level as the humm. very very nice...
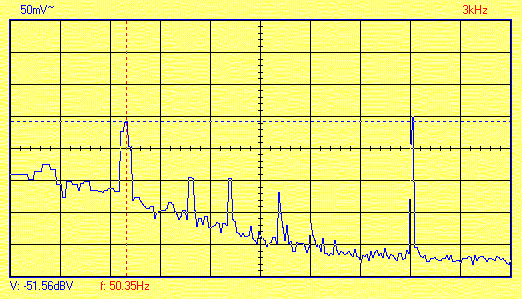
Humm measurement without. 10dB worse as you can see..... Still not really audible, but still I leave the covers on the tubes.....
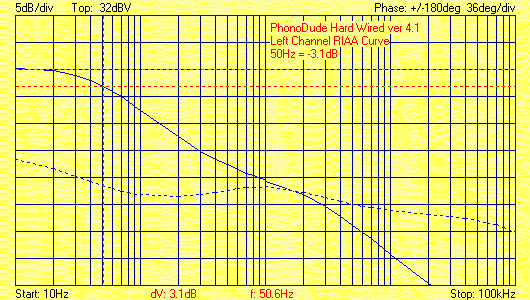
RIAA measurements, showing 50Hz point
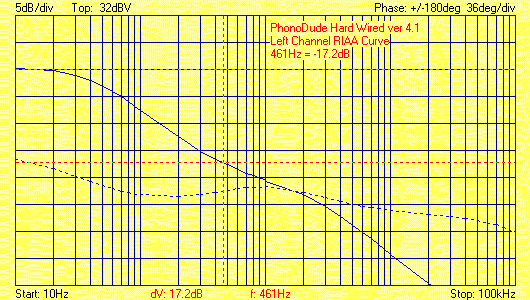
RIAA measurements, showing 461 Hz point
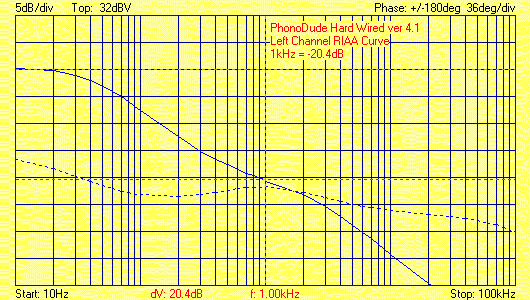
RIAA measurements, showing 1kHz point
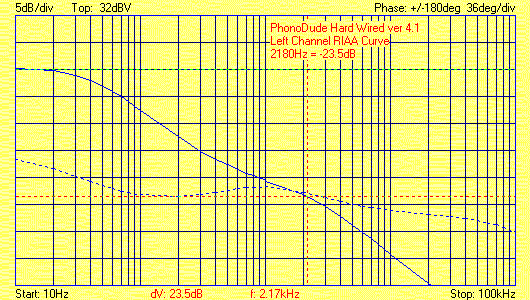
RIAA measurements, showing 2180Hz point
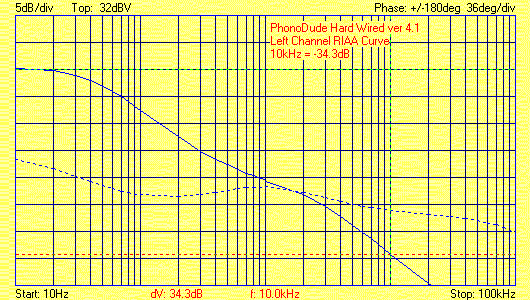
RIAA measurements, showing 10kHz point
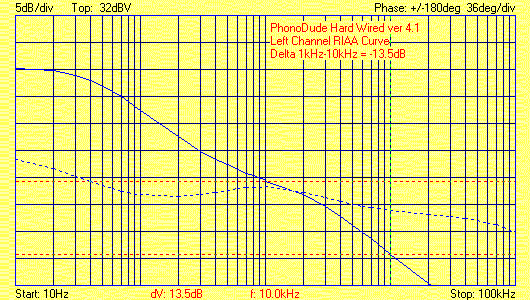
RIAA measurements, showing delta measurement
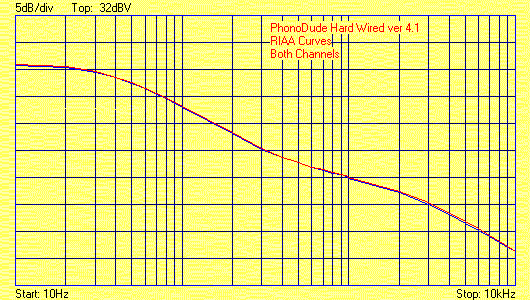
Both
channels are practically identical....
Conclusion: Specs are absolutely OK. So we can concentrate on the
listening aspects :-)
Listening and
some tweaking...
I am using the PhonoDude in my standard system with the
LINN LP12/EKOS/LINGO/Ortofon-Jubilee combination with the Sowter 1:10
Step up transformers. The results were as with the PCB version very very good.
I have listened to all kind of music, classic, pop, jazz and in all instances
the PhonoDude performed better then the "old" DD-PRE RIAA amp. They are
both very good, but the PhonoDude is presenting more sound stage, more detail, more
air around everything. The old RIAA is more laid back, less revealing
acoustics..... The PhonoDude is truly the best RIAA I have been hearing so far
!!! all fine now? Not completely
yet..............
I was using some standard 5751 in the first set up. And even though I was very satisfied, I wanted to see what difference it would made if I plugged in some real good ECC83 tubes in the second stage... I was able to obtain 2 matched pair original Telefunken smooth plate ECC83 in Ebay. These tubes are legendary, not only for performance but also for price.... So I was almost skeptical if it was worth the extra money I spent. Well, let me be short..... It is definitively worthwhile to invest a little bit more. The Telefunken tubes are opening up the whole stereo image by a few meters more and are soft as silk, very very precise and giving more "texture" to the sound. Te step is somewhat larger as if you would replace a standard couple capacitor with for example an Auricap. This puts things a bit in perspective I hope.....
Conclusions !!
I really enjoyed building the PhonoDude gain, but now in a completely different set up. Thanks to the Chassis Service of Schäfer, optically things look very professional now. The audible results are thanks to the WKZ capacitors and the Telefunken tubes better as the first setup with the PCB version, but the price is also much higher. Pick your choice :-) !! In summary, the PhonoDude has helped me again to further enjoy my Vinyl collection........ and motivated me to invest in it again...
Happy building, listening AND testing.......
Doede
IMPORTANT: The information provided on this page is intended as guide for DIY activities and therefore free to copy and or publish. If any one wishes to use any of the information from my WEB site, please make sure to refer and footnote to my URL Link as source! Doede Douma