

Updated:
08-Dez-06
Gydinel
The new
Master Reference Loudspeaker system
Speaker Enclosure Construction
(Final Update Sept 4th)
In the meantime the Gydinel enclosure reached its final state and is playing music already !!! Guido did a great job and I am extremely grateful he has been putting all this time in this woodwork master piece...
I have been doing the finishing touch and the images below will just tell you the story......... Sit back and enjoy........
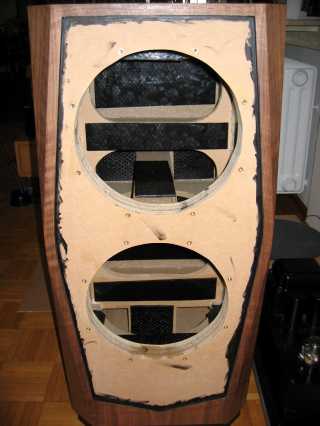
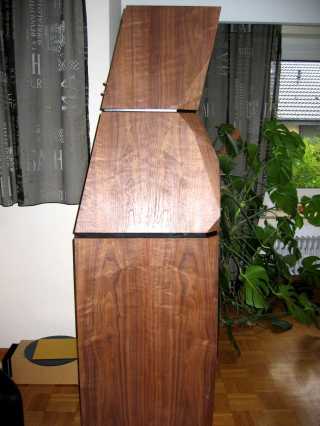
First details of the construction of the subwoofers. As you can see, Guido works all the edges under 45 degrees, which allows for a great finishing with veneer.
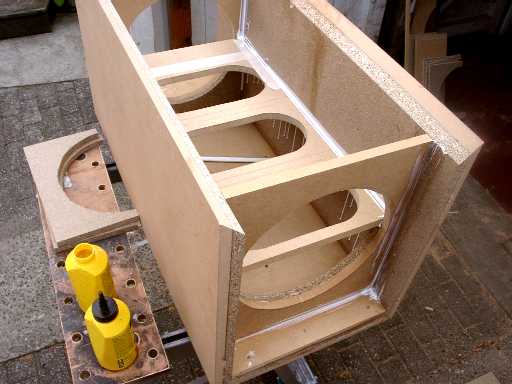
Clearly a lot of work is put
in making the enclosure as stiff as possible. The baffle is 3 layers thick !!
Also note the use of two different type of materials to create the panels. This again
reduces resonance.....
To allow for the Rubber Fronts (Moosgummi) to fit in at the same level as the chassis, a separate wood layer is glued on top.
After a nice party we had at
Guido's house early August, I picked up the enclosures and brought them to my place where
the "finishing" started.
Below a series of pictures giving an idea of the work........
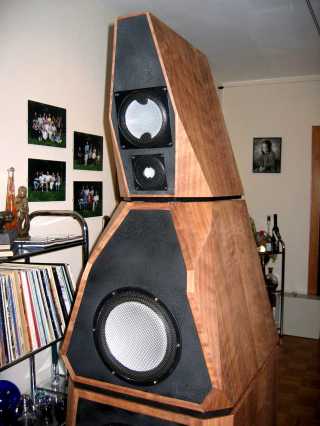
First impression of the Gydinel in the listening room and the start of the extreme precise job of cutting the rubber baffles.

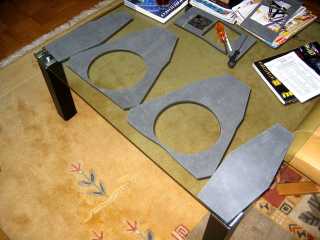
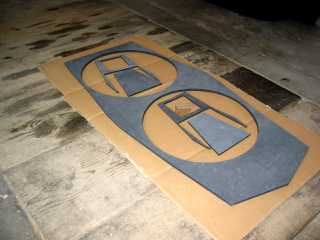
I measured just point for point on the enclosure, copying this to the rubber plates and very slowly cut out the right shape, every time trying on the box to see if we were still on track.... pffff, boy, was I glad this worked fine..... As an underground for the cutting I used an old glass plate from a small table.....
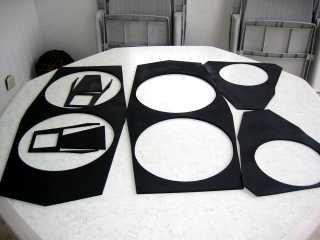
The Rubber finish looks pretty crappy, and cannot be glued just like that on the front, so I sprayed them mat black. I was afraid it would not hold or smear, but amazingly enough the rubber stays flexible and the paint sticks very well, even with the gluing, you can press it on with your hands, without smearing it or make nasty spots.... The idea behind the rubber is to minimize reflections from the baffle and it looks good too ................. :-)
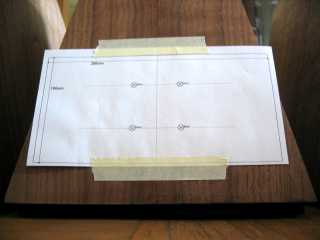
For the LS terminals, I used
a small printed help. This works much easier and makes sure the terminals are optically
line up. Also it makes the sound more transparent and more dynamic thanks to resonance
losses at the specific location of the enclosure !!
(you did not believe this, do you? I really hope so, haha! :-)
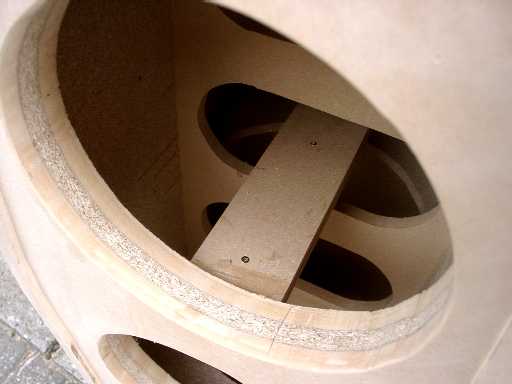
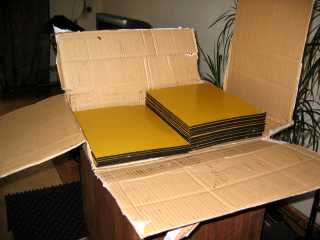
At the right the rest of 43 Bitumen plates to make the enclosures as dead as possible.....
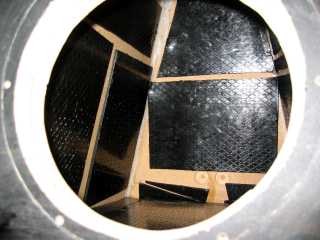
Few details of the damping with these plates, no need for exact coverage, just glue it at every spot which could possibly vibrate..... My hands still hurts from pressing the plates against the inner sides......
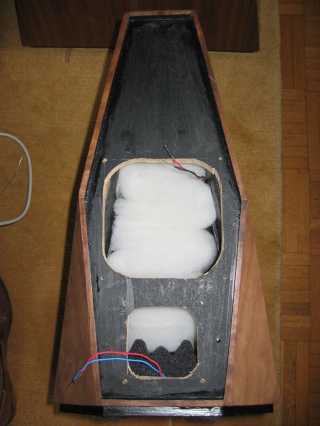
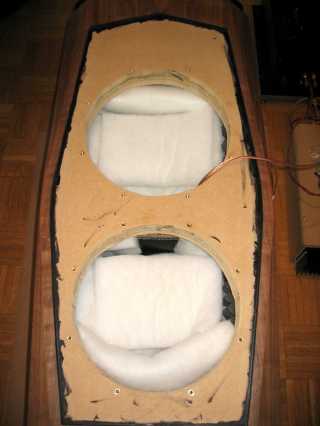
Now the SONOFILL damping material was brought in to reduce unwanted sound energy to come back back through the cone of the loudspeaker units.... I followed the instructions of the supplier to use one piece per 20 liter. By doing this you nicely fill up the space without any pressure on the material, so it keeps a airy structure.
Also note the Silver cabling !!!!
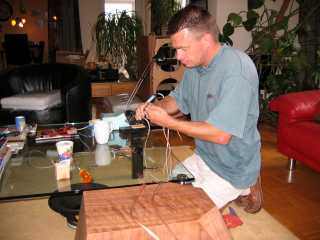
Little ego picture :-) I turned my living room in the work shop as I did not wanted to bring the very heavy enclosures downstairs !!! Actually I weighted them and total is 110kg per channel.........

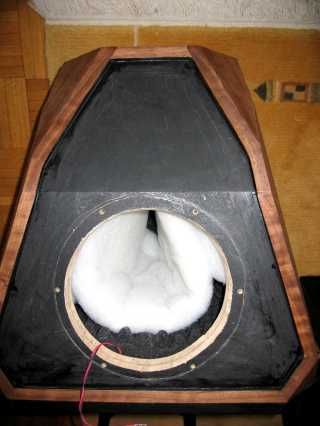
3 images of the damping of the Subwoofers....... See, I try to avoid any possible resonance and coloration of the sound.....
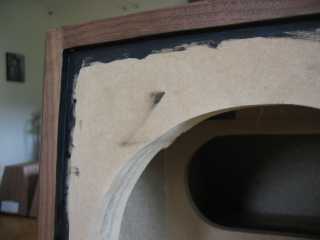
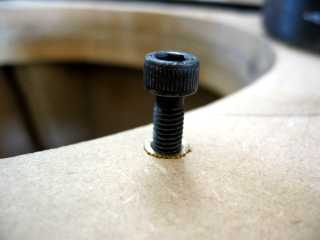
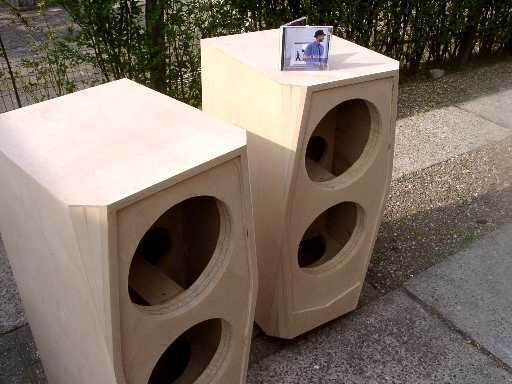
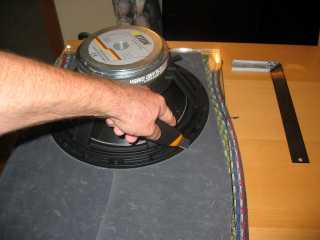
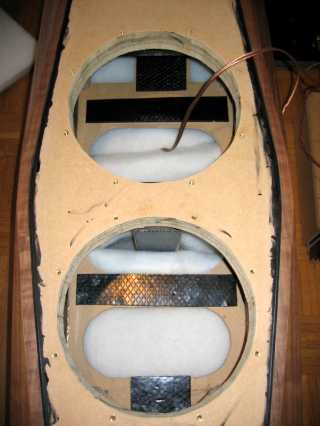
Two small details: ofcourse we do not want light spots in the gap between enclosure and rubber baffles, so I painted them all black, whilst playing the Rolling Stones ..... At the right a detail of how the chassis will be mounted on the baffle.

Last work done, Rubber baffles glued in, cables connected and units mounted...................

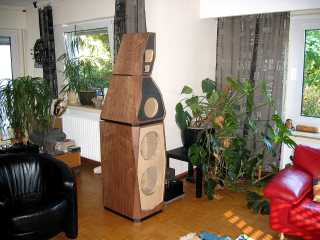
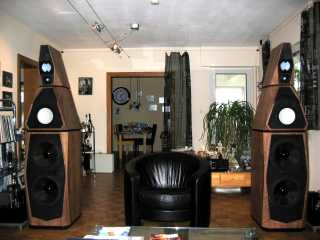
I must admit they take a dominant place in the listening room, but no need to feel ashamed about this. These jewels are to bee seen !!!!!
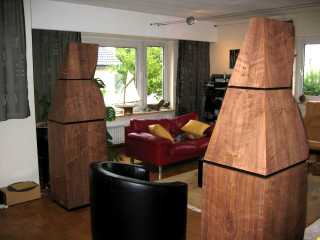
Another view....can't get enough of it as you most likely will understand.....
Happy listening and building !!
Doede Douma
IMPORTANT: The information provided on this page is intended as guide for DIY activities and therefore free to copy and or publish. If any one wishes to use any of the information from my WEB site, please make sure to refer and footnote to my URL Link as source! Doede Douma